Saturday, 18 May 2019
Free to Quilt: The Princess and The Pea
Free to Quilt: The Princess and The Pea: Fairy Tale Dream Since my earliest crafting days, before I even got in to quilting, I had the idea to make something depicting '...
The Princess and The Pea
Fairy Tale Dream

Since my earliest crafting days, before I even got in to quilting, I had the idea to make something depicting 'The Princess and The Pea'.
 It is one of my most loved tales from the Ladybird books I had as a child. Even Elise used to like it when I read it with her, and I still have it.
  I had seen a lovely Tilda designed wall hanging on Pinterest a while ago. So when the book came up for sale on Facebook, I snapped it up! I worked on the doll first, having sourced the genuine Tilda fabric (which was very expensive and a little darker than I thought it would be).
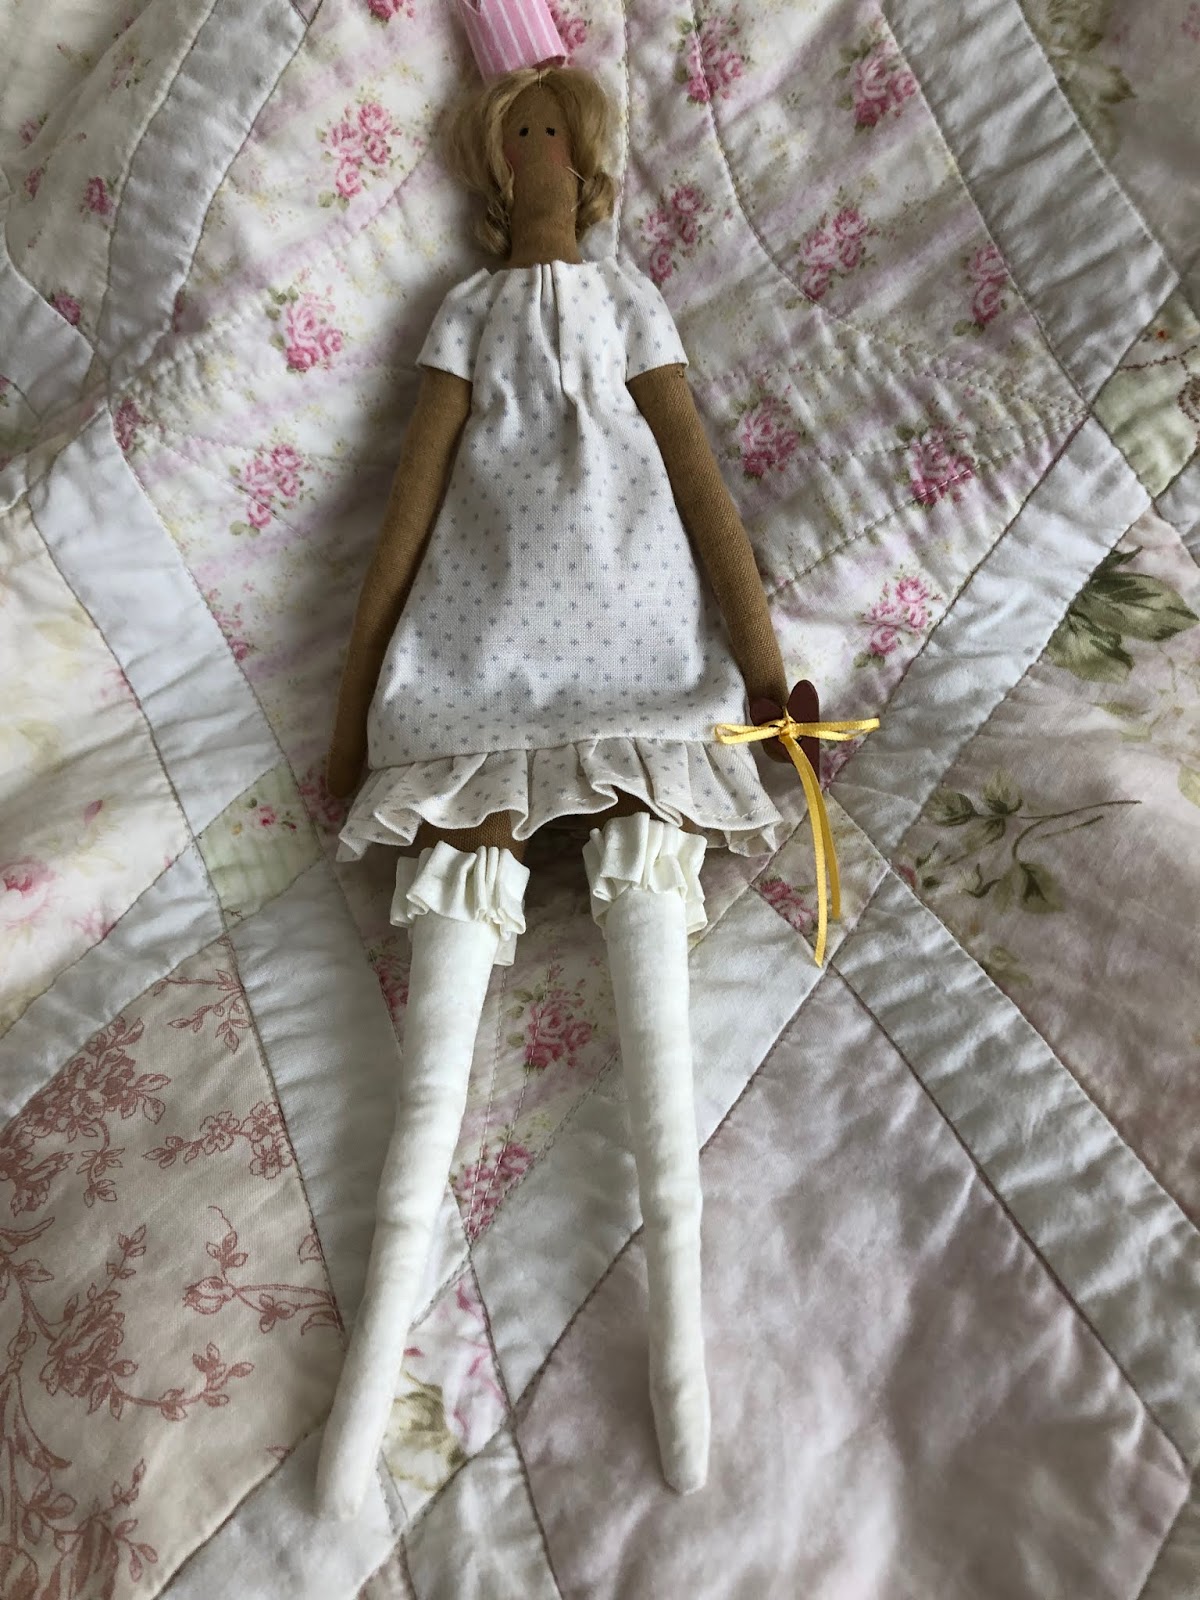
I made a few adaptations to the instructions in the book. For one thing the pattern for the nightdress was meant for the larger doll, so I had to scale it down. The crown just didn't work - so I thought of an easier way to do it. And I wanted her to have real hair (not painted on), so I unravelled a piece of braid, brushed it and gave her a little blonde coiffure! I love her stockings with frilly garters!

 The instructions said to make the quilt first (using the bagging technique) and then to stitch the pieces on afterwards. I chose to put all the pieces on the top, then sandwich it and bind it in the traditional way with more of my pretty 3 Sisters fabric. I did the simplest of hand quilting to finish the folksy look.
 Finally I hung it on this extra special wire hanger which was a treasured gift from Elise.
Happy Quilting Everyone!
Thank you for visiting my blog and for leaving your comments. Please share on Facebook, Pinterest etc.
Sunday, 12 May 2019
Free to Quilt: New Star Rising!
Free to Quilt: New Star Rising!: On The Turn Of A Needle 'Love Birds' One of the things I love about putting together a collection of fabrics for my onlin...
New Star Rising!
On The Turn Of A Needle
 'Love Birds'
 One of the things I love about putting together a collection of fabrics for my online shop is seeing what other people get to make out of them. This gorgeous star /snowball quilt was made by Julia at my class and she did an amazing job. I can honestly say I couldn't have pieced it any better myself. Her choice of fabrics, from several ranges by Moda, worked beautifully (even better in the flesh). In particular, the light tan print from the Rosewood collection by 3 Sisters really made it sing!
 She made such a good job of it, I couldn't resist quilting it for her. It is a large throw for her daughter's sofa.
 Her recycled duvet cover made the perfect backing.

 This is the third example piece I have created and I call it 'Love Birds'. It uses strips of vintage Laura Ashley prints, stitched and flipped onto wadding, cut into heart shapes and 'reverse' appliquéd behind the green background.
 This one is fusible appliqué on a vertical strip pieced background.
 And this is a horizontal strip panel cut and pieced into the background with a scrappy pieced border.I am hoping this will be a really creative workshop.
 'Love Birds'
 One of the things I love about putting together a collection of fabrics for my online shop is seeing what other people get to make out of them. This gorgeous star /snowball quilt was made by Julia at my class and she did an amazing job. I can honestly say I couldn't have pieced it any better myself. Her choice of fabrics, from several ranges by Moda, worked beautifully (even better in the flesh). In particular, the light tan print from the Rosewood collection by 3 Sisters really made it sing!
  She made such a good job of it, I couldn't resist quilting it for her. It is a large throw for her daughter's sofa.
 Her recycled duvet cover made the perfect backing.
Other than that, I have been practising a new skill - needle turn appliqué. My inspiration was to produce samples for the workshop I am doing for Connecting Threads in November. The theme is 'Something Scrappy' (naturally) and we are going to make wall hangings based on strip piecing.

 This is the third example piece I have created and I call it 'Love Birds'. It uses strips of vintage Laura Ashley prints, stitched and flipped onto wadding, cut into heart shapes and 'reverse' appliquéd behind the green background.
The birds were then needle turn appliquéd on top. I've also used some nice decorative stitches from my Brother machine. I so enjoyed the technique, once I got the hang of it (and bought a thimble!), I was able to pass on what I had learned to the ladies at Studio Quilters. We all had a go on Saturday and it made a nice change.
Here are two earlier samples I have made:
 This one is fusible appliqué on a vertical strip pieced background.
  And this is a horizontal strip panel cut and pieced into the background with a scrappy pieced border.I am hoping this will be a really creative workshop.
My latest work in progress is a sweet little Tilda project - watch this space!
Happy Quilting Everyone!
Thank you for visiting my blog and for leaving your comments. Please share on Facebook, Pinterest etc.
Subscribe to:
Posts (Atom)